Ok, seriously this is a V8 moment, while cruising through my facebook feed, I came across a post from Mark Harrell Horse Shows. Now if you've never shown at a Mark Harrell Horse Show, they've got their office work down to a science, really! Their suggestion was to get all your paperwork done before you got to the office and remember to PHOTO your breed card and papers with your smartphone, this way if you forget to bring your papers or card with you, they still have all the information they need!
As a trainer, I will definately be doing my card this way, I'm constantly losing it with one client or another, when they sign me up for a class, they bring my card back and put it "somewhere" and then I forget about it, until NEXT show...lol.
Ingenius... why didn't "I" think of that.
Monday, April 9, 2012

Friday, January 6, 2012
Why being in shape is so important
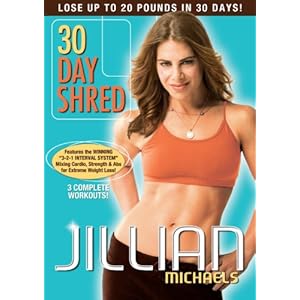
New year, new year's resolutions. The best showmanshippers are the ones that are in shape, I'm not saying they have the "perfect" body, but they have the wind in their lungs to practice and then go in on a long pattern and arrive in front of the judge not winded. Showmanship takes cardio, upper AND lower body strength, if you're lacking it's going to show to the judge. Think about it, all patterns have running, running in circles (balance) and practice usually involves pulling your horse around, sometimes head down (or up) and you need that upper body strength! If you don't work out on a regular basis, or feel you don't have the time/money, whatever may I highly recommend Jillian Michaels 30 Day Shred, it's a 20 minute a day workout that really gets everything into shape in 20 minutes/day (of course check with your dr. before starting any workout) and currently is $6.99 at amazon... cheap for the results you'll get, you'll notice you're balance improving, your upper and lower strength improving and most importantly, you'll get less winded.

Monday, August 15, 2011
The Power of Positivity
I've been observing at the shows here lately, a. lot. I watch parents, I watch trainers and I watch those that they are coaching, and I've come to the conclusion that those that coach with positivity, generally, have happier students and better placings. I'm not saying they don't inform their student what they do wrong, but they start off by telling them WHAT THEY DO RIGHT, then they explain what needs more practice without belittling them, making them feel inferior or calling them names.
Think about it, if you are belittled for every little mistake you do, does it make you want to try harder or just get out of the situation? Are there too many mistakes? Maybe it's time to break things down into baby steps, so that the student can succeed. When starting with a green horse or client, we have "small" goals, like stick the pivot...no matter what ELSE goes wrong in the pattern try and STICK YOUR PIVOT, this way they can come out of their class feeling the sense of ONE ACCOMPLISHMENT, which encourages them to tackle another goal (like making it straight to the judge, setting up in under 3 seconds, trotting AROUND the cone...well, you get the idea).
TEARS: I once over heard a trainer say to her crying student "I don't do tears" and walked away from the crying child. What this trainer did was abandon her student and left her student frustrated. Personally, I don't like tears either, but I've been to that point where I'm soooo frustrated that it is my frustration release mechanism. When I have a student on the verge of tears (we try not to get to the tear point, but it DOES happen), we either work through the problem together...or we take a break and come back to the problem when my student is calmer and more in control of their emotions...and I'll tell them, go take a break and we'll return to this when you feel better (no reason to point out that they are crying, most likely they are embarrassed enough just by crying). Remember that tears can come from frustration of TRYING to do it right and then feeling that failure of not getting it right, most times, if handled correctly, it will motivate your student to practice more...
NAME CALLING and BELITTLING: Usually this only manages to make the student feel worse. If they are not understanding the coach, then it is UP TO THE COACH to find a different method to teach so the student understands. Many times I can tell a student the same thing until I'm blue in the face, my husband steps in and says the same thing in a slightly different manner and TADA instant understanding. Not fortunate enough to have a partner in crime, sometimes a parent/friend of the student can help you out...most of the time it's just slight miscommunication and finding the "phrase" that your student will understand.
So if you are coaching your child, a friend, or are fortunate enough to be a mentor (meaning someone LOOKS UP TO YOU!), do so with positivity, build a person up, be a POSITIVE role model.
Think about it, if you are belittled for every little mistake you do, does it make you want to try harder or just get out of the situation? Are there too many mistakes? Maybe it's time to break things down into baby steps, so that the student can succeed. When starting with a green horse or client, we have "small" goals, like stick the pivot...no matter what ELSE goes wrong in the pattern try and STICK YOUR PIVOT, this way they can come out of their class feeling the sense of ONE ACCOMPLISHMENT, which encourages them to tackle another goal (like making it straight to the judge, setting up in under 3 seconds, trotting AROUND the cone...well, you get the idea).
TEARS: I once over heard a trainer say to her crying student "I don't do tears" and walked away from the crying child. What this trainer did was abandon her student and left her student frustrated. Personally, I don't like tears either, but I've been to that point where I'm soooo frustrated that it is my frustration release mechanism. When I have a student on the verge of tears (we try not to get to the tear point, but it DOES happen), we either work through the problem together...or we take a break and come back to the problem when my student is calmer and more in control of their emotions...and I'll tell them, go take a break and we'll return to this when you feel better (no reason to point out that they are crying, most likely they are embarrassed enough just by crying). Remember that tears can come from frustration of TRYING to do it right and then feeling that failure of not getting it right, most times, if handled correctly, it will motivate your student to practice more...
NAME CALLING and BELITTLING: Usually this only manages to make the student feel worse. If they are not understanding the coach, then it is UP TO THE COACH to find a different method to teach so the student understands. Many times I can tell a student the same thing until I'm blue in the face, my husband steps in and says the same thing in a slightly different manner and TADA instant understanding. Not fortunate enough to have a partner in crime, sometimes a parent/friend of the student can help you out...most of the time it's just slight miscommunication and finding the "phrase" that your student will understand.
So if you are coaching your child, a friend, or are fortunate enough to be a mentor (meaning someone LOOKS UP TO YOU!), do so with positivity, build a person up, be a POSITIVE role model.
Friday, August 12, 2011
Horse and Rider August 2011
If you don't have it, go and purchase the Horse and Rider August 2011 magazine. Fantastic article on Showmanship. I even learned a few new things!
Monday, August 8, 2011
Showing at Congress this Year?
It's getting to be Congress entry time, they are requiring a Piroplasmosis test. Be sure to be up to date on all the health regulations and get your vet appointments scheduled, check it all out at OQHA.com
Thursday, August 4, 2011
What ARE they looking for?
Can't figure out what the judge's are looking for in showmanship? Here's a fantastic judges guide (complete with photos) on what the AQHA judges are looking for . I ran across this little gem of information when downloading some score sheets. Be sure to look it over...very informative.
Wednesday, August 3, 2011
Congress...are you going?
Thoughts of going to Congress? It is AUGUST...time for entries to be turned in. Remember that you MUST turn in your entries by August 25th and this year for the first time ever they are taking online entries! Be sure to visit OQHA's page to find out all about Congress!
Monday, August 1, 2011
Hair Buns, really the only way to go.
Ok, so we've discussed hats, let's discuss hair. You want to make a good first impression on the judge, make sure your hair is neat and tucked underneath your hat. No fly aways, no pony tails, no snoods (those hairnet things you put over your pony tail and attaches with a barrette. If your hair is shoulder length, it MUST be in a bun. A bun is appropriate for every age and looks the most professional with your showmanship clothing. You can dress it up a little with a small pretty bow (age appropriate of course), we purchase the thin ribbon rolls at Wal-Mart for under $1/roll to match outfits. You don't need a hair dresser to put one in yourself, I've done it a million times to myself and they are easy to do (and trust me when I say they are easy...I'm a hair MORON!). If you are a visual person here is a link on how to put a bun in . Just remember you still need to put your hat on your head, so put the bun in at the base of your neck. Also remember to bobby pin your hat to your head so it stays on, on those windy days. Here's a great article from the Equine Chronicle talking about hair and the judge's comments on them!
Friday, July 29, 2011
Pattern 50: Novice
 Instructions:
- Starting with Cone 2, back your horse 2 horse lengths
- Trot past cone 3, make an arc as drawn.
- Upon completion of arc stop at cone 3 and complete a 360 degree pivot.
- Walk to judge and stop.
- Set up for inspection.
- Follow ring stewards instruction after dismissal.
Findings:
- Beginning with cone 2, back 2 horse lengths (about 10 steps) when my students finished their front feet were at cone 1.
- Trot past cone 3, stopping at cone 3 and being in line with Judge, now this could be problematic if you don't have a good sense of direction, because unless you are tall or have a short horse, you were turning blindly into your horse to line up with the judge.
- Stopping at cone 3, you needed to stop with your nose, the judge in our pattern was VERY CLOSE to cone 3, so if you stopped at the shoulder you were sure to run over the top of the cone during your spin.
- As you are finishing up your spin, be sure to look up and at the judge so that you don't over or under spin.
- Walk off to judge and then stop and set up for inspection.
- Upon dismissal, I instructed my clients a 90 degree turn, look at judge and walk away...
Tuesday, July 26, 2011
Hats
After seeing some fabulously AWFUL hats at the last few shows...let's discuss hats. A nice hat is what defines what kind of show person you are...floppy brim, dirty, flies off your head screams NOVICE!!!! A nicely shaped, clean and well fitting hat says "I'm a Pro!".... what does your hat say about you?
Straw Hats
I LOVE my straw hat (photo'd below), nice and cool and less likely to give me a "hat" headache...the only downfall of straw hats is that they are only wearable MEMORIAL DAY through LABOR DAY. Straw hats are much cheaper than a nice felt, but make sure they have that show crease... they should be kept in a hat box also to maintain their nice shape.

Straw Hats
I LOVE my straw hat (photo'd below), nice and cool and less likely to give me a "hat" headache...the only downfall of straw hats is that they are only wearable MEMORIAL DAY through LABOR DAY. Straw hats are much cheaper than a nice felt, but make sure they have that show crease... they should be kept in a hat box also to maintain their nice shape.
Felt Hats

Nothing says PRO like a nice felt hat AND they are "in" all year (unlike straw hats) BUT they are pricey! Get the most X you can afford (I personally show in a 100X that I STOLE for $250 from someone getting out of showing). Felt hats are more delicate, and require delicate handling, DO NOT handle by their brim, instead handle them by their crown. Invest in a hat brush and brush your hat after each day at the show. Store in hat can... keep it AWAY from plastic bags!!!!! I see lots and lots of people stuffing their felt in plastic rain covers during a rain storm...they are RUINING their hats...they are STEAMING those delicate brims...let it rain and let it dry...then get it reshaped! A really good felt will last for YEARS!

Now I'm going to PLUG one of my favorite shopping places (and this is where I'm borrowing my photos from) PARDS. These are my go to guys from everything from boots to hats... and they know how to shape a hat!!!! LOVE MY PARDS.
Shaping
Ask for a show crease...your hat will have those wonderful corners as shown above....
Remember, showmanship is like going in for a job interview...first impressions COUNT...let it be a good one with a good hat!
Monday, July 25, 2011
Why you should KEEP SHOWING after your mistake....
Ok, ok, I know it's be FOR.EVER since I've posted...consider that my business has been, well, busy... it's a good thing for me...but maybe not for my followers... anyway....
One of my students was showing this weekend, standing up at the first cone WAITING on the judge, but this pattern had her start by standing on the right side of her horse, what my student DIDN'T see was the HUGE HORSEFLY land on her horse's muzzle. She could tell the moment she started her pattern that her horse was not acting right (at this point she had no idea why he was acting weird), shaking his head, he was trying to swipe at the fly with his legs as he pivoted (though he never moved his pivot foot) and was shaking his head the entire way to the judge. The judge even commented she thought he might have a fly...my student...never losing her cool...just smiled and said "I have NO IDEA what came over him"...and continued on with her cross overs and never let her horse's action deter her from showing him... she finished the pattern and came out and saw a POOL OF BLOOD by his chin... OUCH! Poor Fellow! Her placing out of 12...2nd.... she kept her cool and earned herself a point. She told me afterwards that she kept hearing my voice "keep showing!"...and it paid off!
***ALWAYS KEEP SHOWING!*** let it be your new mantra!
One of my students was showing this weekend, standing up at the first cone WAITING on the judge, but this pattern had her start by standing on the right side of her horse, what my student DIDN'T see was the HUGE HORSEFLY land on her horse's muzzle. She could tell the moment she started her pattern that her horse was not acting right (at this point she had no idea why he was acting weird), shaking his head, he was trying to swipe at the fly with his legs as he pivoted (though he never moved his pivot foot) and was shaking his head the entire way to the judge. The judge even commented she thought he might have a fly...my student...never losing her cool...just smiled and said "I have NO IDEA what came over him"...and continued on with her cross overs and never let her horse's action deter her from showing him... she finished the pattern and came out and saw a POOL OF BLOOD by his chin... OUCH! Poor Fellow! Her placing out of 12...2nd.... she kept her cool and earned herself a point. She told me afterwards that she kept hearing my voice "keep showing!"...and it paid off!
***ALWAYS KEEP SHOWING!*** let it be your new mantra!
Saturday, April 30, 2011
Patterns to Practice
Looking for something to practice? Mark Harrell Horse Shows puts their patterns up BEFORE the show...it's an excellent place to get some patterns... here's the links.
The Show with a View Pattern Book
The Tri-State Pattern Book
These pattern books also have horsemanship and equitation...lots of fun stuff..
Happy Practicing!
The Show with a View Pattern Book
The Tri-State Pattern Book
These pattern books also have horsemanship and equitation...lots of fun stuff..
Happy Practicing!
Friday, March 11, 2011
Pre-Season Show Prep
So you've started on YOUR cardio...right? That's what I thought...LOL...really get out there. I personally HATE to exercise, I'm doing Jillian Michaels 30 Day Shred and I can't tell you the HUGE difference I've seen in MY cardio...and I HAVE a PHYSICAL job! LOL It will make showing so much easier for you...and boost your confindence!
Let's discuss things you can do while we're waiting for our arena's to dry and our horses to shed.
GO THROUGH your show clothing and TRY ON...
Now for your horse...
Did anything freezer over the winter? You may have to pitch that fly spray or anything aerosol.
Do you have enough:
Let's discuss things you can do while we're waiting for our arena's to dry and our horses to shed.
GO THROUGH your show clothing and TRY ON...
- Make sure you don't need to take in or let out.
- Take stock of what you have and what you need to replace.
- Polish your boots.
- Do you have high water pants? Get those to a seamstress!
- Are your clothes CLEAN? If not, take care of that too.
- How's your hat? Creased, cleaned, ready to go?
- What about your crystals? Are they all on? If not, order some for repairs, and order some extra's for future repairs.
- Do you have extra safety pins for numbers (or maybe you make your own numbers)
- How about bobby pins and hair spray, are those packed for those windy days?
- All your hair accessories? Extra bands, hair nets, etc...
- Be sure to have an emergency sewing kit for those oopsies that happen.
Now for your horse...
- Is the vet scheduled for spring shots and coggins tests?
- Worm your horse, it will help not only with it's health, but promote shedding as well.
Did anything freezer over the winter? You may have to pitch that fly spray or anything aerosol.
Do you have enough:
- Face Grease
- Bands for Manes
- Black/White Chalk/Spray for legs
- Disposable Razors
- Fly Spray
- Electric Tape for Tails
- Brushes? Tail, Body, etc...
- Show Sheen/Pepi
Thursday, February 17, 2011
Preparing for show season....
The snow is melting where I'm at, and after dealing with waaaay below normal temps, melting snow gives me a little spring fever! The horses are feeling it also, now I know many of you still have hairy horses, your pastures are mucky and everyone is feeling a little..umm...soft.... So how can YOU prepare for show season since you've pretty much been a couch potato? Get up and get your cardio going, one thing is for sure, showmanship can definately get your cardio going and YOU don't want to be the one wheezing after the long sprint to the judge, now do you? So it's time to get FIT!!! I don't mean lose weight, go on some crazy diet...I mean get FIT!!! Start walking, take a look at your local video store's exercise dvd's and start one, try the WII fit, use your treadmill or whatever you have at home, pull out your bicycle...well you get the idea, get up and get that heart pumping!...and if you're fortunate enough to have a "dry" arena, walk and/or jog while you lunge your horse...as well as work on your showmanship. NOW is the time to get YOURSELF fit while waiting for the weather to change...don't delay, work on that cardio TODAY!
Friday, July 2, 2010
Pattern 49: Breed Show Amateur/Youth
I had heard "rumors" this year about how "hot" the coneless patterns were going to be. This is the first time our barn has run into them. My clients enjoyed them, but found them quite challenging. So here's my take and the difficulties we encountered.


Findings:
- A few of my students had a difficult time figuring out where to break to the walk from the trot, most were about 2 steps too far (you should be even with the judge). Also make sure you are transitioning that trot to walk and NOT trot stop walk...
- Make sure you walk far enough "north" before you start turning on your circle, if not, you'll encounter backing problems later in your pattern.
- You should begin your trot as you cross your walk path.
- Stop with your hip at the judge and pivot 1 3/4's.
- Now depending on how close you are to the judge you'll need to back...but save yourself some room to perform the 180 and the set up... which proved to be problematic in the class too many...
Have fun practicing...
Wednesday, June 16, 2010
This years show findings...
...Ok, so you're missing the patterns and I just quite frankly, am out of time to computer draw them...sorry... busy barn, busy judging schedule...and I haven't had a day off in a least 3 + Weeks...LOL...so...no pattern THIS time, BUT since we're on the road I'll give you a taste in what we are finding...
Lots of Trot to Walk transitions this year...so start practicing those.
Spins and lots of them...more than 360's...last weeks pattern required 3 spins.
These are the "in" things apparently this year...
Ok, back to business...happy practicing!
Lots of Trot to Walk transitions this year...so start practicing those.
Spins and lots of them...more than 360's...last weeks pattern required 3 spins.
These are the "in" things apparently this year...
Ok, back to business...happy practicing!
Friday, April 2, 2010
Basics: YOUR Body Positioning for Walk/Trot
Unsure where your body needs to be when walking/trotting your horse? Answer your shoulder should be even with your horse's throat latch.
Below the exhibitor is too far behind her horse...
 Below the exhibitor is too far in front of her horse...

Below the exhibitor is just right (sounds like the 3 bears doesn't it? LOL). Although I can tell her horse is starting to lag behind because she's using the pull/release method of getting her horse to speed up just a bit by where her hand is next to his nose (waaay in front).
 Thank you to the 2 Janet's and Elaine for being our demo's!
Below the exhibitor is too far behind her horse...
 Below the exhibitor is too far in front of her horse...
Below the exhibitor is just right (sounds like the 3 bears doesn't it? LOL). Although I can tell her horse is starting to lag behind because she's using the pull/release method of getting her horse to speed up just a bit by where her hand is next to his nose (waaay in front).
 Thank you to the 2 Janet's and Elaine for being our demo's!
Monday, March 29, 2010
Pattern 48 : Breed Show Amateur/Youth
 Findings
Don't let this pattern fool you either, straight lines are difficult!
- START directly in line with the judge, trot quickly and be mindful of your stop at cone 2, a popped hip will spell disaster for your back.
- Back at least 4 or 5 steps, you want to be sure you're going to clear BOTH cones 1 and cone 2 on your spin
- Perform your 360, possibly pulling your horse forward. Be sure not to over or under spin
- Walk briskly to the judge and stop 1 1/2 arms length away
- Setup for inspection, since no instructions are given, upon dismissal perform a 90 and walk away.
Sunday, March 28, 2010
Pattern 47: Breed Show Novice
 Findings
Don't be fooled by first glances, this pattern is challenging. Straight lines are VERY difficult! Our judge made it extra challenging by placing cone 2 VERY close to the pivot line, you had to be almost on top of the cone to make your hip inline with the judge.
- Be ready at cone 1, walk briskly to cone 2
- Stop with your horse's hip at cone 2 (this is something to really practice ... this is a make/break part of your pattern). TIP, count how many steps YOU take when you pass the judge until you need to stop...this will help in the showpen
- Stop and perform your 90, do not over or under pivot
- Trot to cone 2, stop at your horse's nose. Be mindful of your stop, you do NOT want a kicked out hip because when you back it needs to be PER.FECTLY straight...
- Back at LEAST 4 steps
- Walk to judge and stop with 1 1/2 arms length away
- Set up for inspection
- Upon dismissal perform a 90 and walk away
Friday, March 26, 2010
Basics: YOUR Body Position, BACKING
You thought you had a nice pattern, but didn't even place, here could be the reason.
Standing directly in front of your horse to back will disqualify you on most judges cards. This is a dangerous position to put yourself in, IF your horse spooks you could be run over, or if your horse rears you could be pummelled.
 Below our exhibitor is in a much better position safety wise, she's slightly in front of her horse so that she can see where to guide her horse and she's off to the side so if something should spook her horse she can quickly move off to the right.

Standing directly in front of your horse to back will disqualify you on most judges cards. This is a dangerous position to put yourself in, IF your horse spooks you could be run over, or if your horse rears you could be pummelled.
 Below our exhibitor is in a much better position safety wise, she's slightly in front of her horse so that she can see where to guide her horse and she's off to the side so if something should spook her horse she can quickly move off to the right.
Subscribe to:
Posts (Atom)


